Using Git with a Graphical User Interface RStudio
Last updated on 2025-11-11 | Edit this page
Estimated time: 17 minutes
Overview
Questions
- What is a Git GUI and how does it relate to the command line?
- How can I use Git in RStudio on the University of Edinburgh’s Noteable service?
Objectives
- Define what a Git GUI is and why you might use one.
- Use RStudio to clone a repository via its Git integration.
- Configure Git with your name and email address.
- Stage, commit, and push changes using RStudio’s GUI.
- Verify that your changes appear on the remote repository.
1. What is a Git GUI?
A Git GUI (Graphical User Interface) provides a visual alternative to
the command-line interface. Instead of typing commands like
git commit, users can interact with buttons, menus, and
panels. GUIs are helpful for:
- Beginners who aren’t yet comfortable with terminal commands
- Visualising the commit history and file changes
- Handling merge conflicts more easily
RStudio includes built-in Git support, making it easy to integrate version control into your analysis projects.
Reassure learners that the GUI is not a “less powerful” version of Git—it’s just another interface to the same tool. Some users will transition back and forth between the GUI and command line.
2. RStudio and the Noteable Environment
We will be using RStudio Server via the University of Edinburgh’s Noteable platform. This cloud-based RStudio environment supports Git integration and is ideal for version-controlled reproducible research.
3. Configure Git in Noteable
The first time you use Git in a new environment (like Noteable), you need to tell Git who you are:
You can run this in the Terminal pane in RStudio.
4. Clone a Repository with RStudio
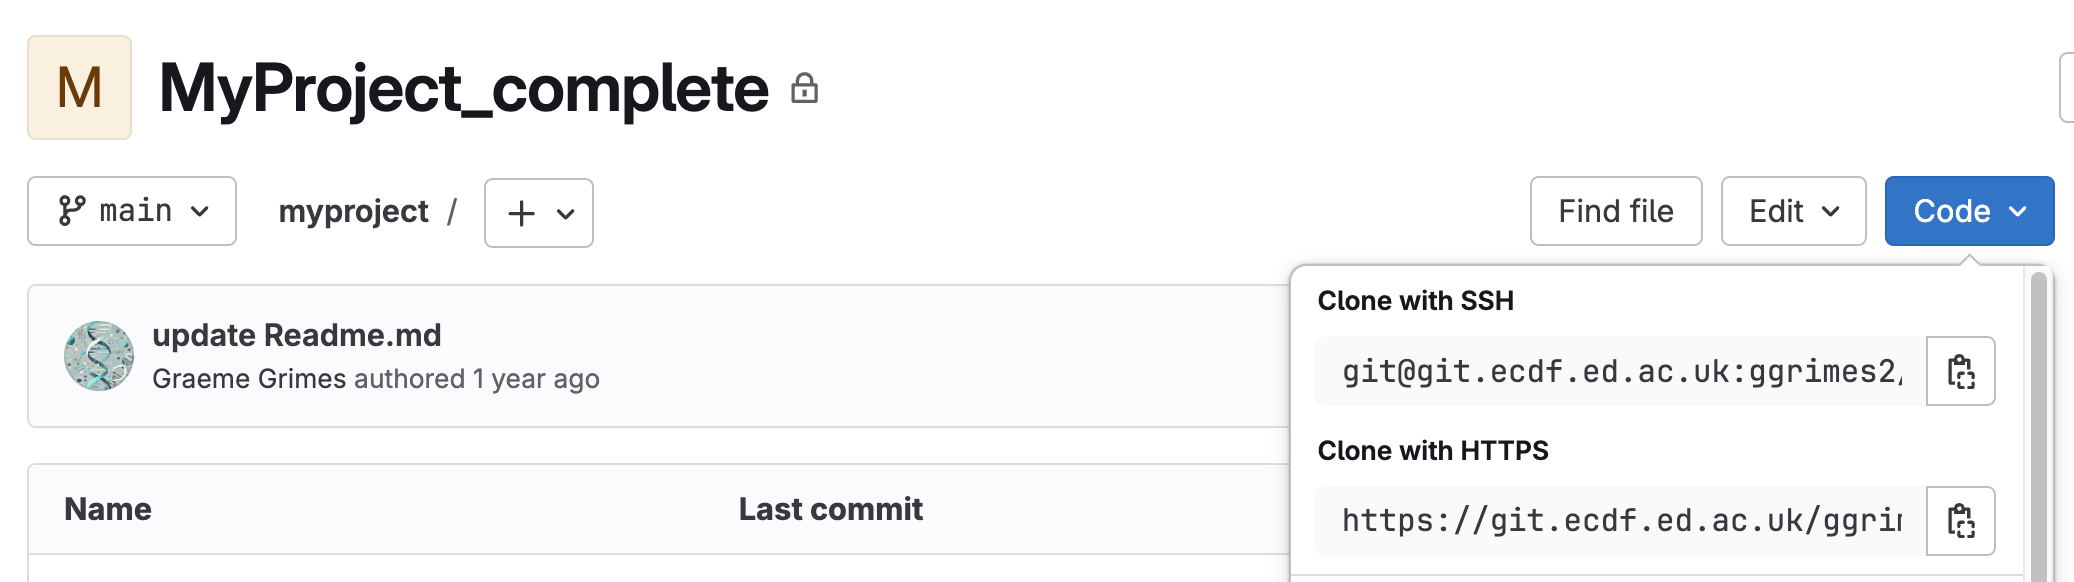
Now let’s bring your project into RStudio: This can be found on the GitLab repository page.
- First copy the Clone with HTTPS text from GitLab
- In RStudio, go to the top menu: File → New Project → Version Control → Git
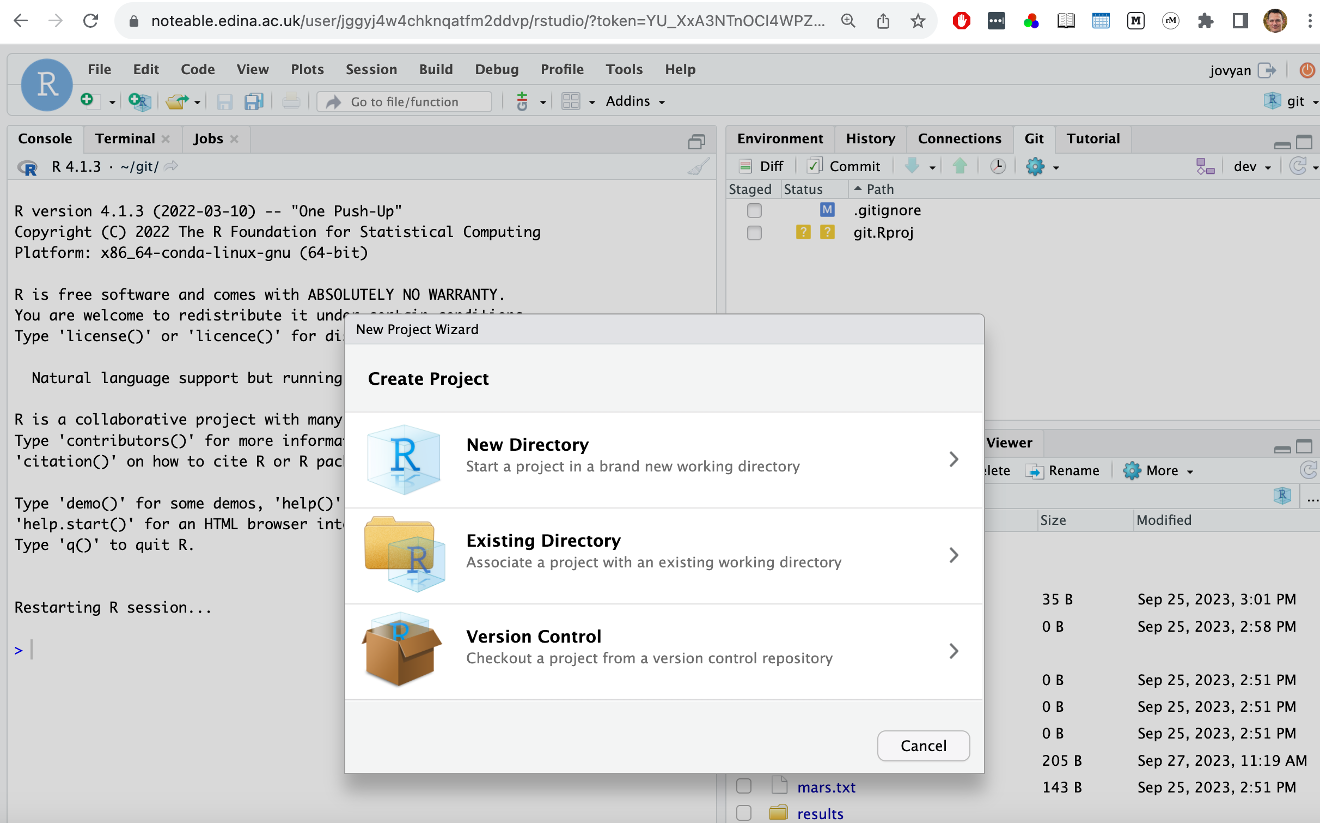
-
Enter the Repository URL:
https://git.ecdf.ed.ac.uk/<username>/myproject.git -
Choose a directory to clone into (e.g. your home folder or
~/projects)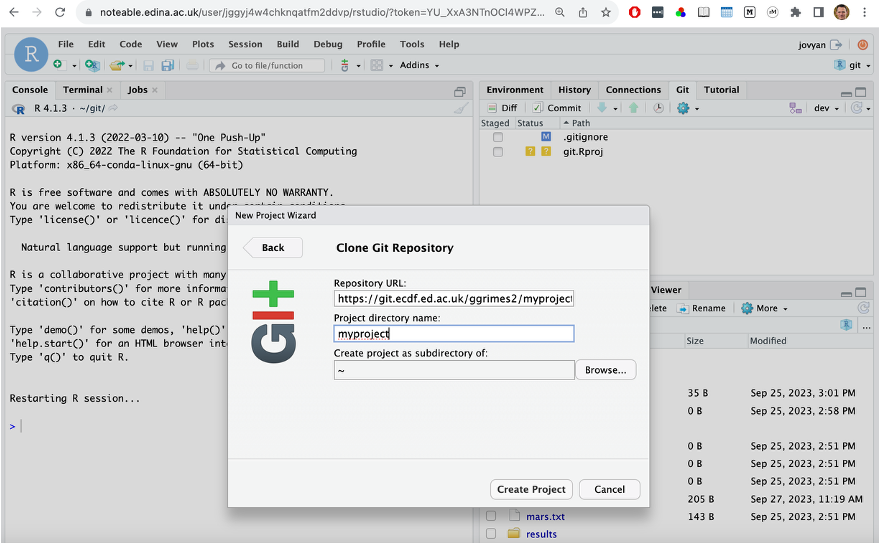
Click Create Project
RStudio will open the project and show the Git pane in the top-right.

5. Make a Change to README.md
- In the Files pane, click on
README.mdto open it. - Add a sentence like:
This change was made from RStudio on Noteable. - Save the file (
Ctrl + Sor File → Save)
6. Commit and Push from RStudio
- In the Git pane, you should see
README.mdlisted as modified. - Tick the checkbox next to it to stage the file.
- Click Commit. A window appears.
- Write a short commit message,
e.g.
Edit README from Noteable - Click Commit in the dialog box.
- Now click Push (also in the Git pane) to upload your changes.

7. Check the Remote Repository
- Visit your project page on https://git.ecdf.ed.ac.uk.
- Look at the Repository → Files tab to confirm that your changes have appeared.
- You can also check the Repository → Commits tab to see your message.
- Git GUIs offer a visual way to use Git—perfect for beginners and for visualising changes.
- RStudio’s Git integration supports cloning, staging, committing, and pushing.
- Always configure your name/email before making your first commit.
- You can verify success by checking your changes online.